 Created in 2007 by the Pennsylvania Office of Child Development and Early Learning (OCDEL), The Pennsylvania Key implements the work and supports the policies developed and managed by OCDEL. Learn More. >
Created in 2007 by the Pennsylvania Office of Child Development and Early Learning (OCDEL), The Pennsylvania Key implements the work and supports the policies developed and managed by OCDEL. Learn More. >
Created in 2007 by the Pennsylvania Office of Child Development and Early Learning (OCDEL), The Pennsylvania Key implements the work and supports the policies developed and managed by OCDEL. Learn More. >This tipsheet provides step-by-step instructions for managing an event roster.
Instructors or organization administrators must update attendee statuses and mark the event as completed within two weeks of the event’s end date. Events automatically close after 60 days.
Once all event attendees have been verified and no further changes to the roster are needed, you can select Complete Event in the Event drop-down on the Event Details page to mark your event as complete. This should be done only when all roster changes are complete.
If an event needs to be reopened, email pqas@pakeys.org with the Event ID#, Title, and Date(s). Screenshots of the training event details are also acceptable. Reopened events automatically close at the end of the day.
Participant Management:
Payment: If payment is required and participants need to pay after the event, the instructor must add them to the roster. Attendees must then submit payment using the steps below to receive credit.
To Pay Online:
For Check Payments: If an attendee paid by check, click Enter Payment next to their name and complete the required information.
Removal of Participants: Only the PD Registry team has access to remove an attendee once added/verified. If you added someone by mistake, please email registry@pakeys.org with the following details:
Step-by-Step Instructions:
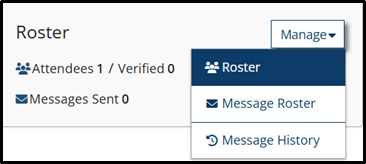
Click the Manage dropdown within the Roster section.

Click Roster.
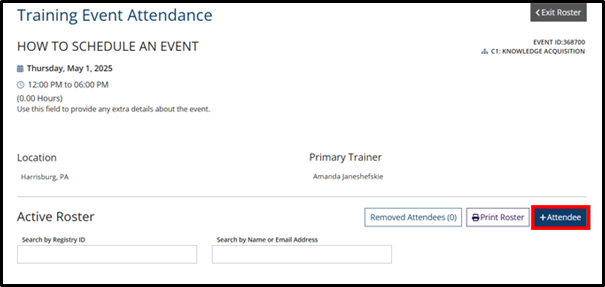
Click +Attendee.
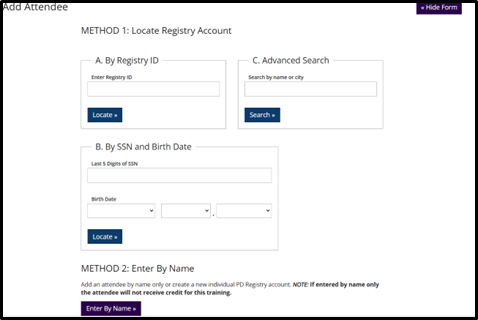
Add Attendee(s)
The attendee will be moved from their current event to the selected event.
Click the pencil icon.
![]()
The PD Registry
registry@pakeys.org
1-800-284-6031