 Created in 2007 by the Pennsylvania Office of Child Development and Early Learning (OCDEL), The Pennsylvania Key implements the work and supports the policies developed and managed by OCDEL. Learn More. >
Created in 2007 by the Pennsylvania Office of Child Development and Early Learning (OCDEL), The Pennsylvania Key implements the work and supports the policies developed and managed by OCDEL. Learn More. >
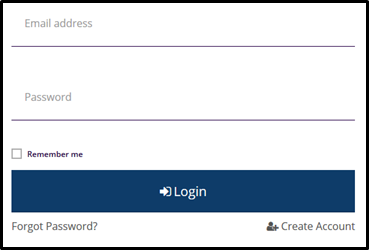
Created in 2007 by the Pennsylvania Office of Child Development and Early Learning (OCDEL), The Pennsylvania Key implements the work and supports the policies developed and managed by OCDEL. Learn More. >Click Login in the top right corner.
![]()
Enter your email address and password, then click Login.
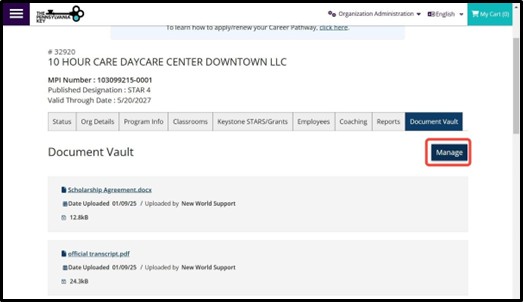
Go to the Organization Profile. Click the Document Vault tab.
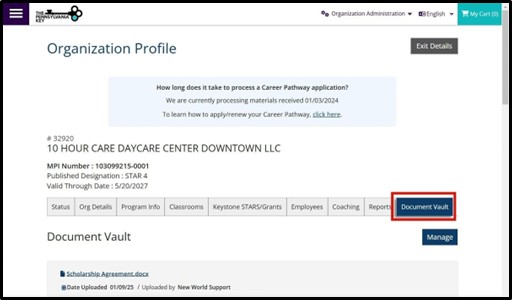
Documents you have uploaded will appear here. To manage or add documents, click Manage.
You can sort your uploaded documents here alphabetically or by date.
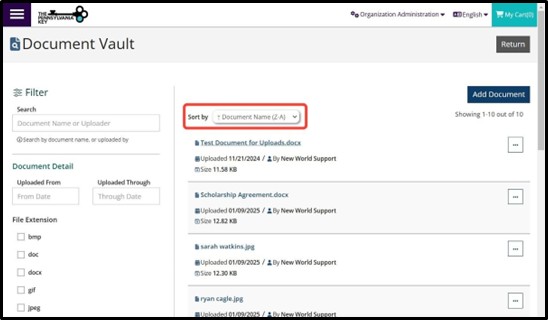
You can search for a document by typing in all or part of the name.
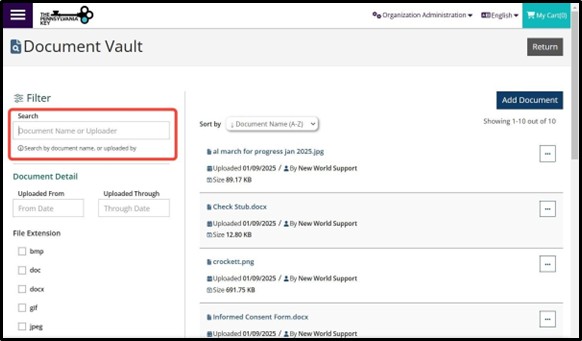
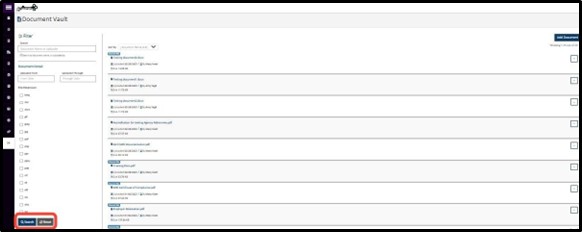
You can also search by date range and file type.
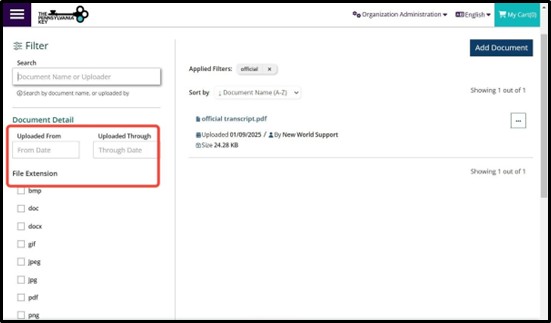
Click Search (or Reset to start over).
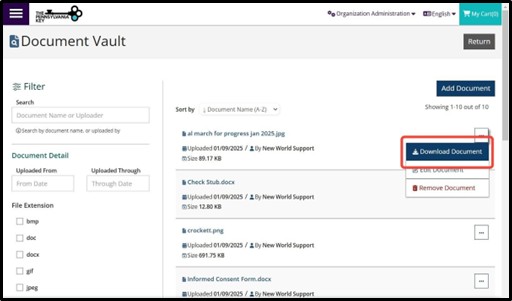
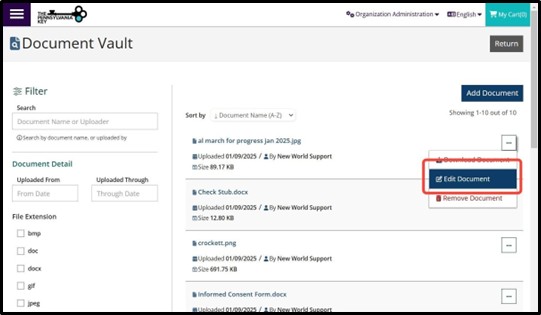
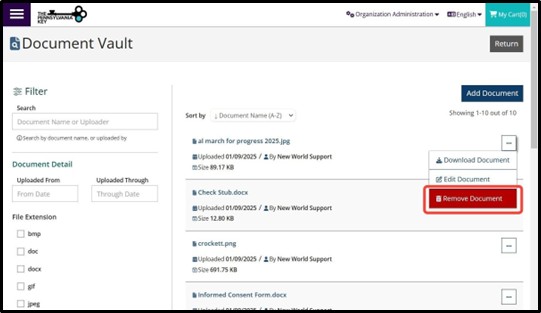
Click the three dots next to a document to download, edit, or remove a document.
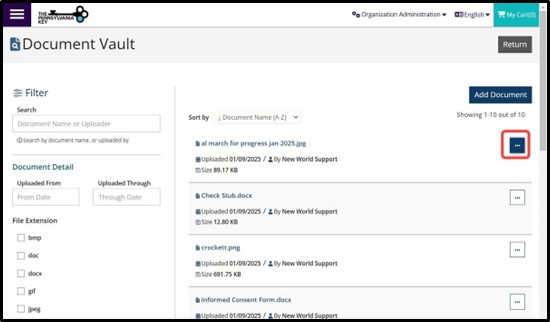
Click Download Document to download a copy to your device.
Click Edit Document to rename your document.
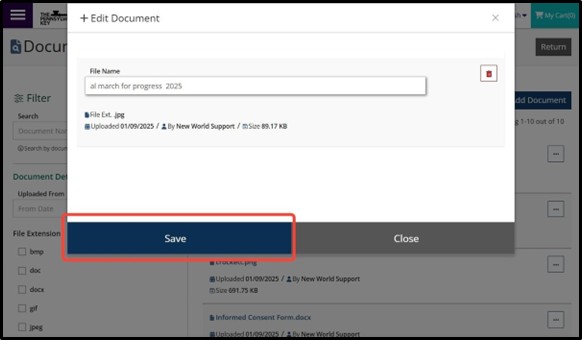
Type in the new name of your document.
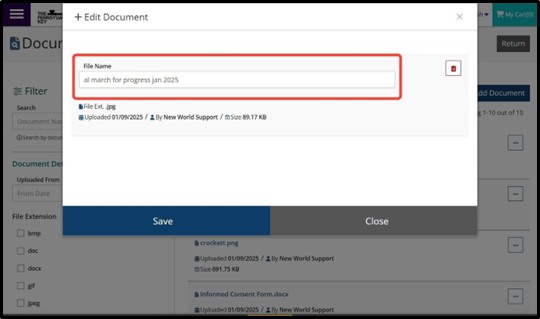
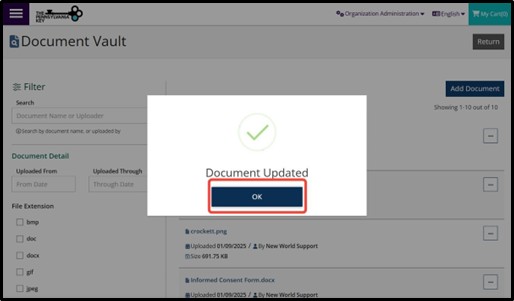
Click Save.
Click OK.
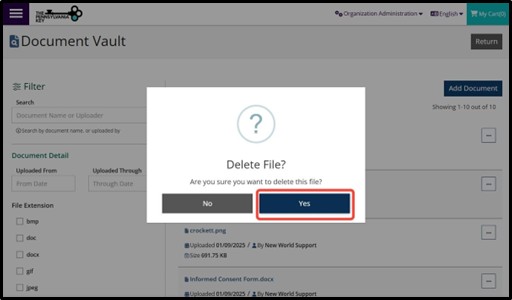
Click Remove Document to permanently remove the document from your Document Vault.
Click Yes.
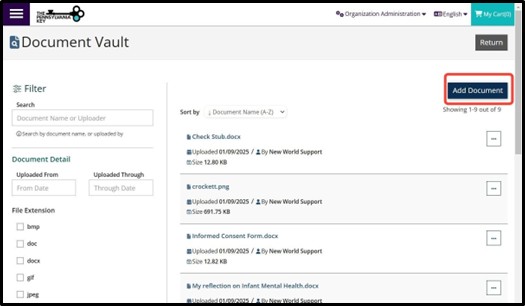
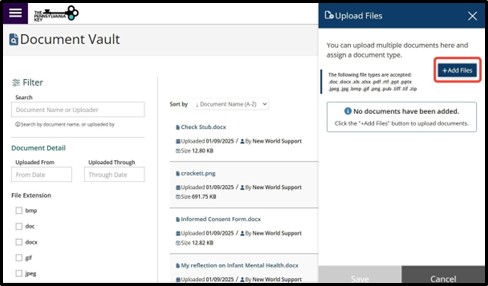
Click Add Document to add a new document to your Document Vault.
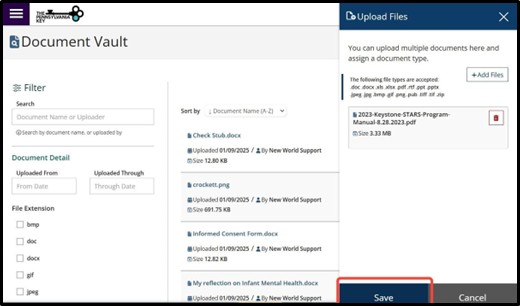
Click Add Files. Select the file(s) from your device and click OK.
Click Save.
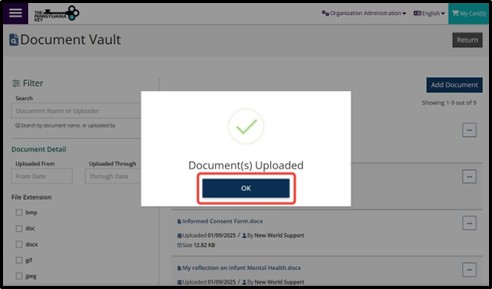
Click OK.
The PD Registry
registry@pakeys.org
1-800-284-6031