 Created in 2007 by the Pennsylvania Office of Child Development and Early Learning (OCDEL), The Pennsylvania Key implements the work and supports the policies developed and managed by OCDEL. Learn More. >
Created in 2007 by the Pennsylvania Office of Child Development and Early Learning (OCDEL), The Pennsylvania Key implements the work and supports the policies developed and managed by OCDEL. Learn More. >
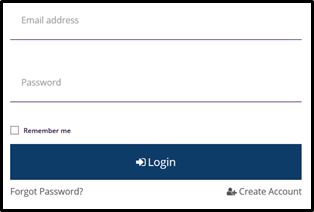
Created in 2007 by the Pennsylvania Office of Child Development and Early Learning (OCDEL), The Pennsylvania Key implements the work and supports the policies developed and managed by OCDEL. Learn More. >Click Login in the top right corner.
![]()
Enter your email address and password, then click Login.
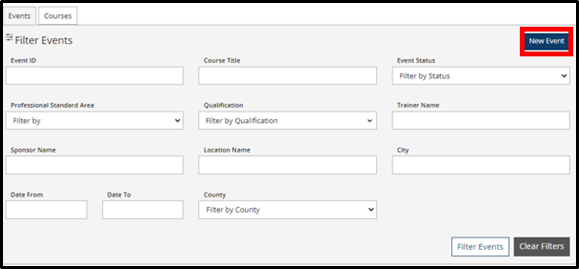
Select Training Entry in the left-hand menu.
![]()
Click New Event.
Select a Course.
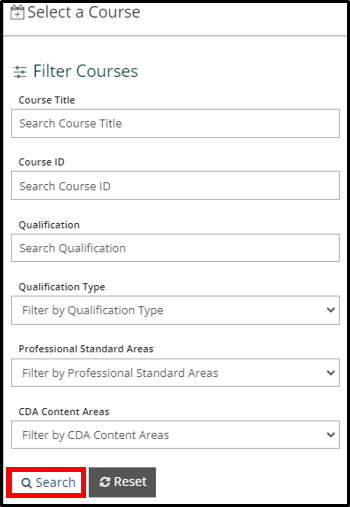
Click Select next to the course you want to schedule.

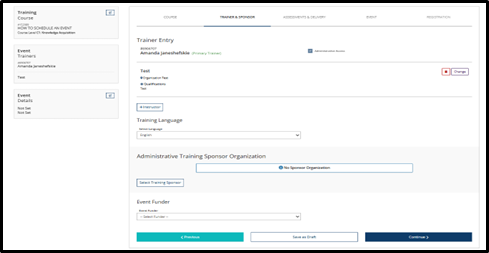
On this screen you will be able to toggle through each section (Course, Trainer & Sponsor, Assessments & Delivery, Event, Registration). You will also be able to toggle through the event by clicking on the edit icons on the left-hand side next to Event Trainers and Event Details.
You will be able to review the course information on this page. Click Continue.

*Organizations— If scheduling under an Org Profile, Trainers must be “Confirmed” in order to publish this event.
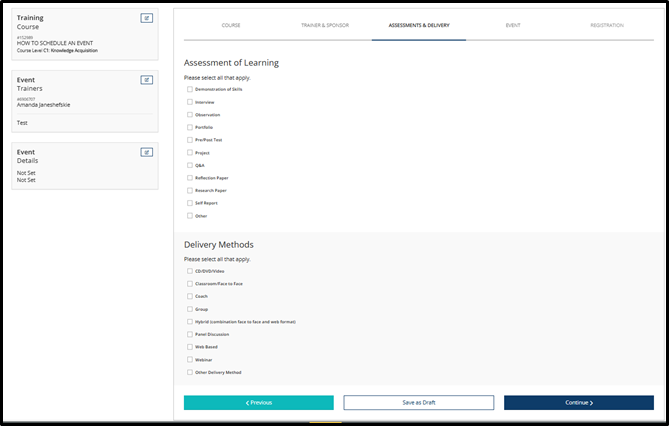
Complete the Assessment of Learning and Delivery Methods sections on this page. Click Continue.
*Organizations: If scheduling under an Org Profile, Location must be “Confirmed” in order to publish this event.
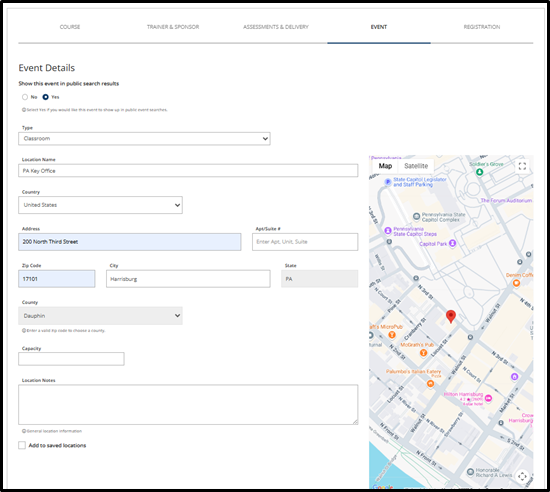
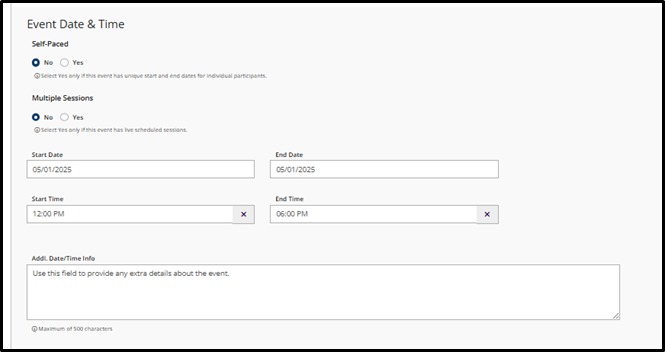
The event hours must match the approved course duration. If they differ, submit a new course with the correct hours. Additional non-instructional time (e.g., breaks, lunch) can extend the event but must be noted in the ‘Additional Date/Time Info Box,’ clarifying that credit applies only to instructional hours.
*Check Confirmed box
Click Continue.
Use the PD Registry to collect registrations.
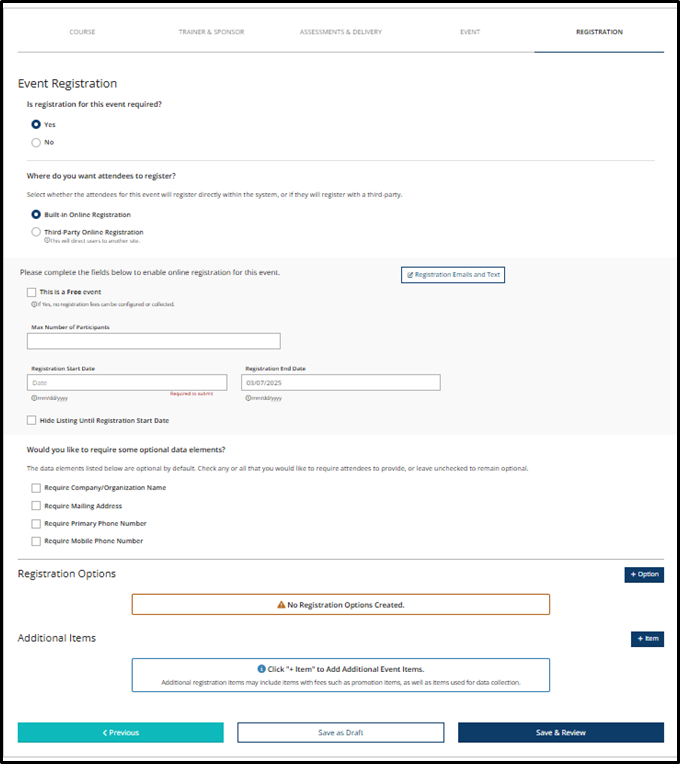
If you do not have a Stripe account, all events will automatically be marked as free.
If your Stripe account is linked and want to accept payment through the PD Registry, click here for step-by-step instructions. Otherwise, check the Free Event box.
To enable payment through the system, you must link a Stripe account. For details, refer to our tipsheet on How to Create a Stripe Account.
This will direct users to another site.

This will direct users to another site.
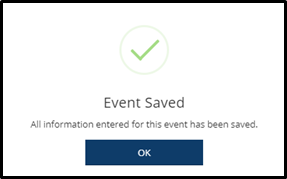
Event Saved: Click OK.
Review the information on this page. To make changes, click Manage within each section. Once all details are finalized, click Submit Event at the top of the page.

If using the Built-In Online Registration, review/agree to the Online Registration Terms and Conditions.

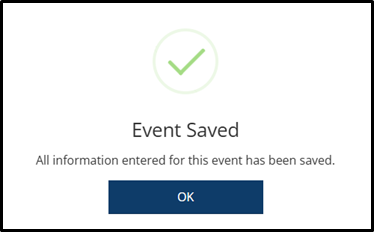
Click OK.
If using Built-In Online Registration:
|
Registration Setup |
Click to edit or update the registration setup. |
|
Preview Registration |
Click to view preview the registration. |
|
View Event Revenue |
Click to review event revenue details. |
|
Registration Emails and Text |
Click to modify registration emails and text. |
|
View Online Registration Terms |
Click to review the online registration terms. |
To edit any Non-Essential Event Information, locate the event and click Manage next to the section you wish to update.
The following fields can be edited after an event has been approved:
The PD Registry
registry@pakeys.org
1-800-284-6031