 Created in 2007 by the Pennsylvania Office of Child Development and Early Learning (OCDEL), The Pennsylvania Key implements the work and supports the policies developed and managed by OCDEL. Learn More. >
Email the PD Registry Team with information regarding the edits needed for a specific course, including:
Please see the tipsheet How to Renew a Course for more information.
*A Pennsylvania Key staff member will advise the instructor on creating a new course if necessary.
To create a course:
1. Go to The PD Registry website.
2. Select Login in the top right corner.

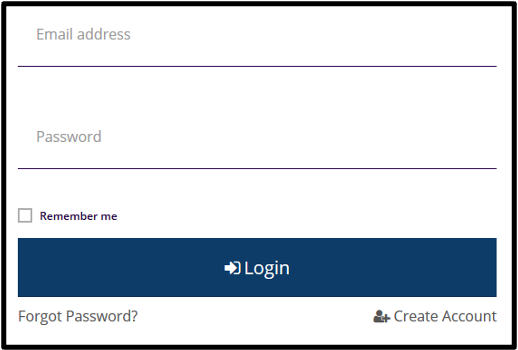
3. Enter your email address and password, then select Login.
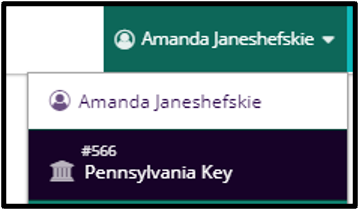
NOTE: If you are creating a course that you personally own, ensure you are working under your personal profile rather than an organization profile. This will ensure the course is associated with you as the course owner.

If you are creating a course on behalf of your organization, select the drop-down menu next to your name and select your organization’s profile (purple box). This will ensure the course is associated with the correct organization.
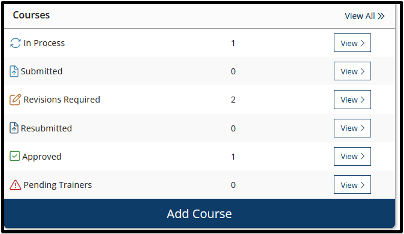
4. Select Training Entry from the left-hand menu.

5. Select Add Course.
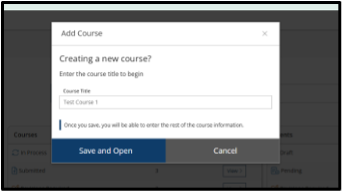
6. Enter the course title and select Save and Open.
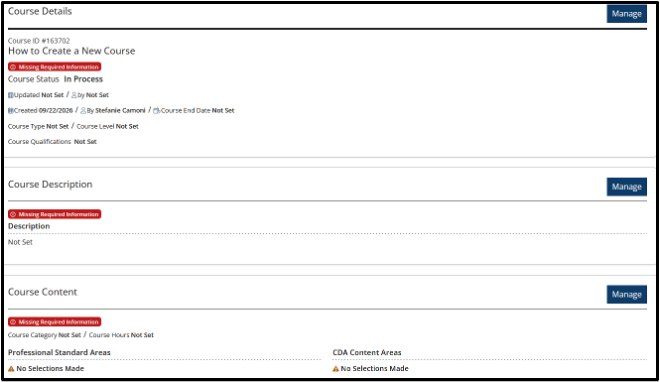
Select Manage for each section to add the course information and then select Save.
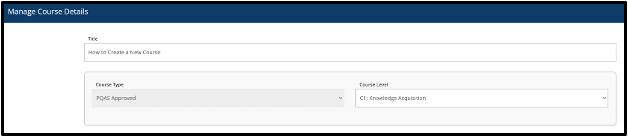
Choose the course level.
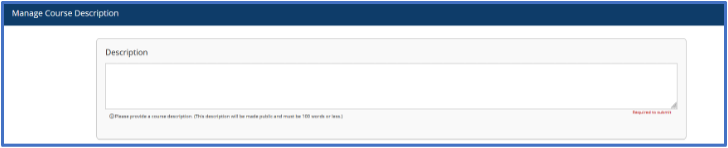
Please provide a course description.
1. All but one section withing the Instructional Plan are optional and do not need to be completed. However, you may provide additional information if it is relevant to your course.
NOTE: if further review is required, you may be asked to submit additional supporting information.
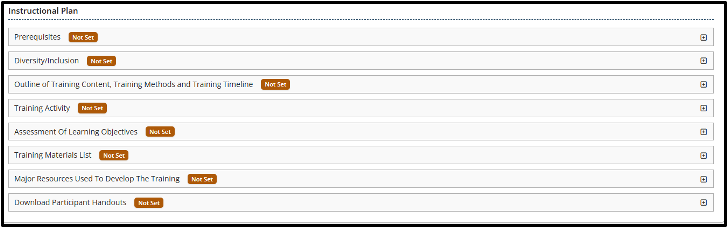
2. Required: Major Resources Used to Develop the Training
You must list resources used to create the course.
NOTE: To continue creating the course, you must enter information directly into this text box. Uploading a document by itself will not allow you to proceed to the next step.
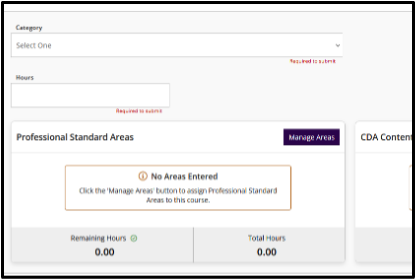
1. Select one Primary Category for the course.
2. Enter the total number of course hours.
3. In the Professional Standard Areas (PSA) section, select Manage Areas.
4. Select the + icon to expand each area. You may select multiple Professional Standard Areas. Select no more than 1-2 PSA objectives per course hour.
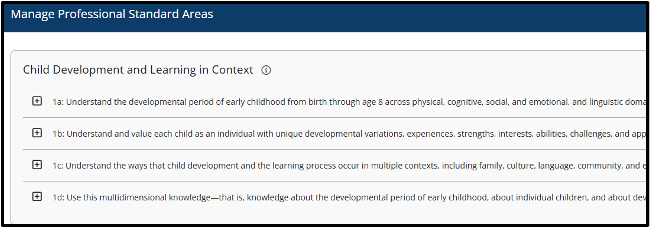
5. When you have finished selecting PSA objectives, select Update.
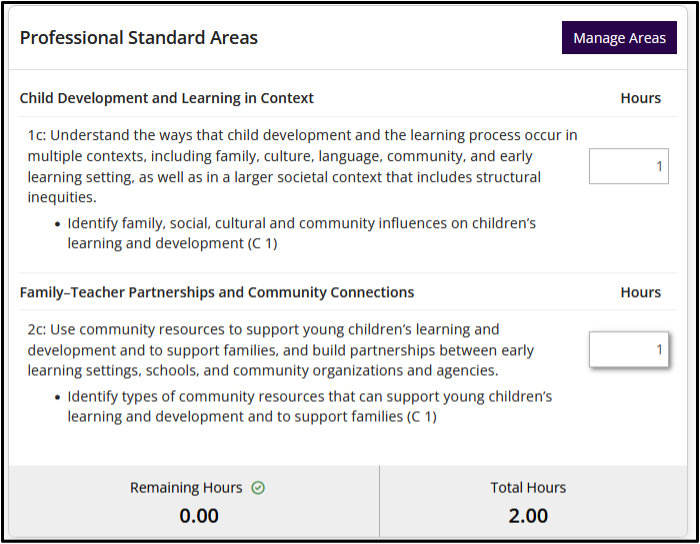
6. Assign course hours to each selected Professional Standard Area and select Save.
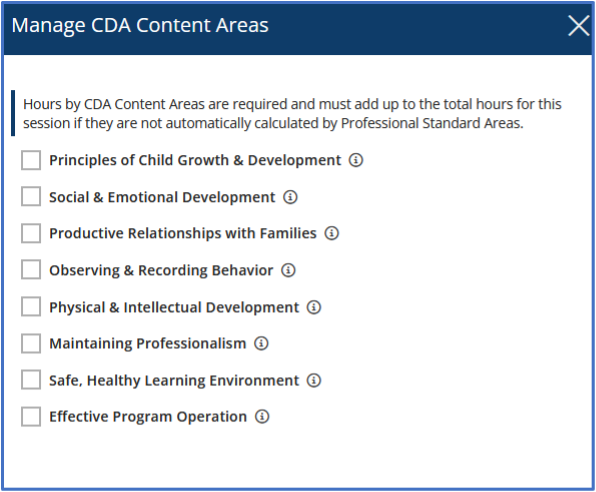
7. Select Manage Areas for the CDA Content Areas
Select ‘Yes’ if there are authorized trainers for your course and select ‘Add trainer’ to add trainers approved to instruct your course.
NOTE for PQAS-Approved Organizations: Select ‘NO’. You are responsible for ensuring your staff and instructors meet the requirements in the Representative Agreement. You will no longer list authorized instructors at the course level. Instead, you can manually list instructors when creating or editing the event.
Add any organization(s) you wish to share this course with. The authorized organization has read-only access to the applicable course information. The authorized organization can create and own events for approved non-expired courses. If there are registration fees, they will be linked to the authorized organization’s account.
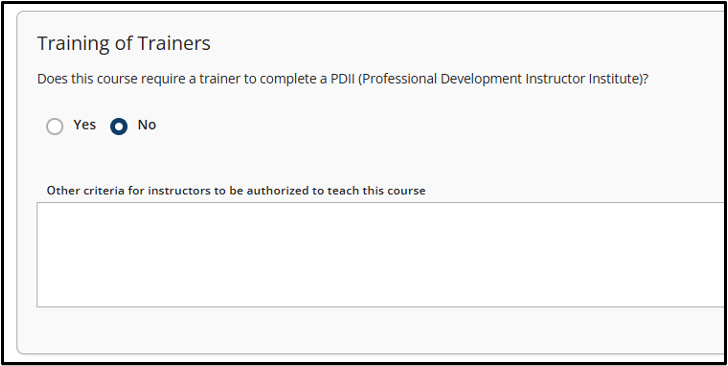
1. Select no if a trainer does not need to complete a Professional Development Instructor Institute (PDII).
2. Select Save.
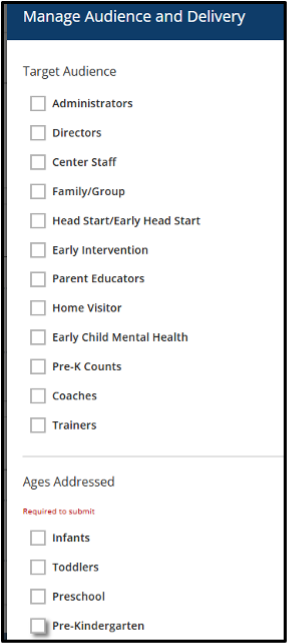
1. Select the Target Audience and Ages Addressed. These are multiselected fields.
2. Select Save.
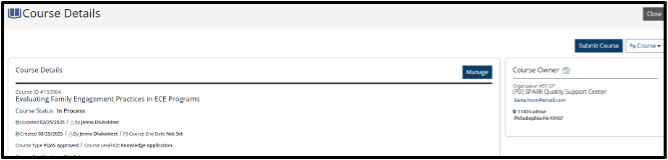
1. Review the course information to ensure all the required fields are completed.
2. Once complete, select Submit Course in the upper right-hand section of the screen.
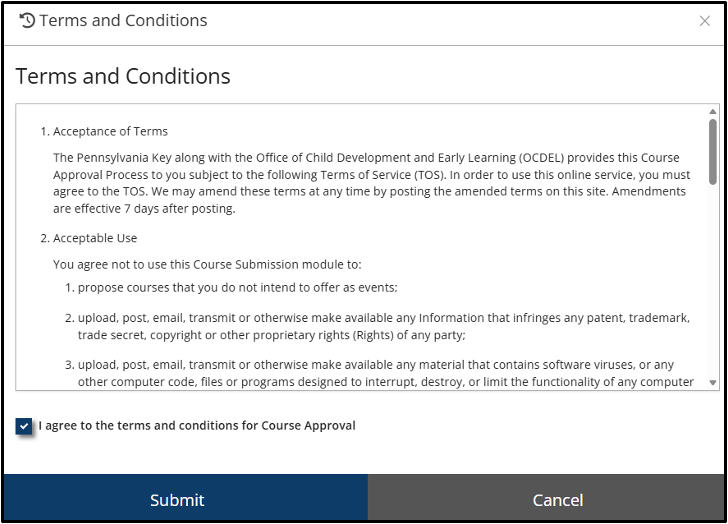
3. Review the outlined Terms and Conditions. Click, I agree to the terms and conditions for Course Approval
4. Select Submit for approval.
Once you have submitted the course, select close to return to your Course Management Dashboard.
Next, select the magnifying glass next to Submitted. Your course will now appear with a Submitted status.
Please allow up to ten business days for your course approval. If your course has not been approved after that time, please email The PD Registry Team and include the course title and course number in your message.
For step-by-step guidance on submitting a course, search for the event titled “Submitting PQAS Courses in the PD Registry.” This provides detailed instructions for each step of the course submission process.
For Instructors and Approved Training Organizations
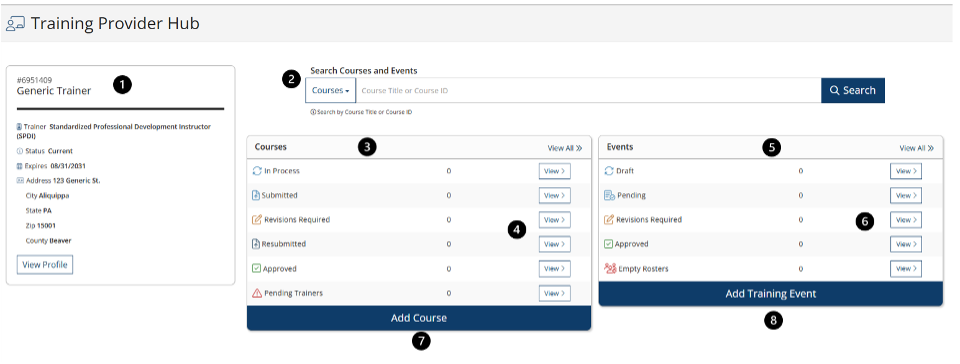
This guide provides an overview of the Instructor Dashboard and explains the available course and event management tools.

Action Required by Instructor/Organization

Awaiting Registry Review

No Action Required
The course has been started but has not yet been submitted for review.
The course has been submitted and is awaiting review.
Changes are needed before the course can be resubmitted and approved.
The course has been updated and resubmitted for review.
The course has been approved and can be used to create training events.
One or more trainers associated with the course require approval.
The event has been created but has not yet been submitted.
The event has been submitted and is awaiting review.
Updates are needed before the event can be approved.
The event has been approved and is ready to be delivered.
Attendance information has not yet been entered for the event.